Create a title block from a DWG file

Tekla Structures
Modified: 29 Oct 2024
2025
Tekla Structures

Create a title block from a DWG file

You can import a DWG title block in Tekla Structures drawing template. This way you do not need to redraw everything inside Template Editor.

Before importing a DWG title block

  • In the CAD software, ensure that the linework is in model space and not in paper space. Tekla Structures does not read information from paper space sheets.
  • You might need to save the title block CAD file in an older DWG format, preferably AutoCAD2000, which removes proxy graphics and is compatible with most Tekla Structures versions.
  • Move the title block to 0,0,0 coordinate.
  • Clean up the DWG file in the CAD software so that you only have the title block in the file, nothing else. Also remove all texts that you do not need in the title block.
  • You might need to clean extra data from the DWG file in the CAD software (try WBLOCK, PURGE, or FLATTEN without hiding objects).
Import and modify a DWG title block

  1. To open Template Editor, in Tekla Structures, go to File menu and select Editors > Template editor.
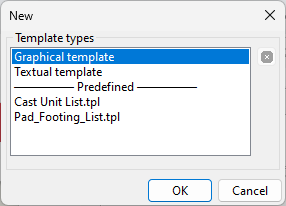
  2. In Template Editor, click File > New.
  3. Select Graphical template.
  4. Click OK.

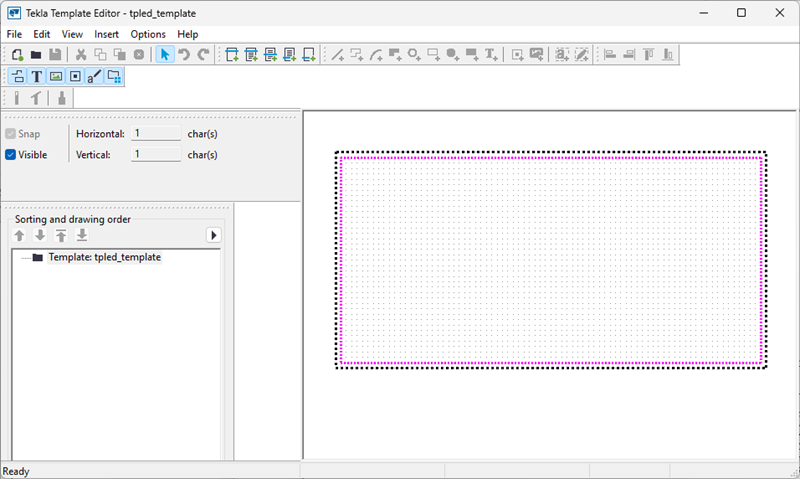
    An empty template opens in the template work area.

  5. You may want to delete all predefined margin settings and adjust the page size later:
    1. Double-click the template to open the Template Page Properties dialog.
    2. In the Margins areas, empty the values from all margin boxes.
    3. Click OK to save the changes.
  6. All templates must be created inside a template row so next, add a row in the template for the drawing title block.
    1. Click Insert > Component > Row.
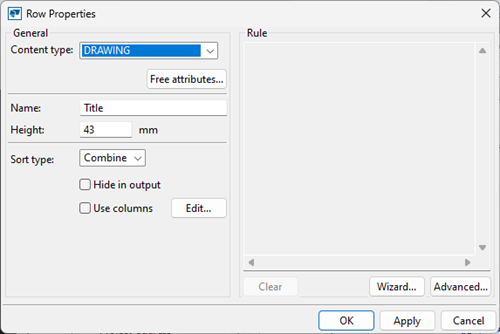
    2. Select DRAWING as the content type for the row, and click OK.

      The content type that you select affects the template attributes that you can add in the value fields.

  7. Select Insert > File and browse for the DWG file.
  8. Select the desired title block DWG file and click OK.
  9. Click inside the row to insert the DWG file.
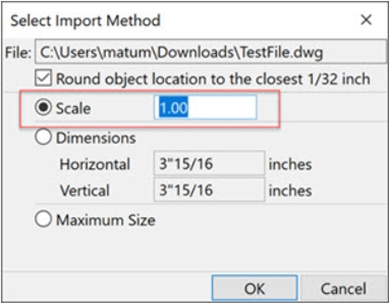
  10. In the displayed Select Import Method dialog, set Scale to 1 and click OK.

    This value depends on the units of the DWG and the Template editor. Once the DWG is inserted, you can verify that the size is correct. Often the needed conversion value is 25.4 (the conversion factor for millimeters and inches) as described in the article Drawing Export Scale Factor for DWG/DXF.
  11. Once the DWG file is imported, all of the elements are grouped by default. Select the group or block, right-click, and select Ungroup.
    Now you can edit or delete content from the inserted DWG title block.
  12. To modify the text properties, double-click a text.
    The title block already contains some text labels added in the CAD software, and you might want to modify the text font, color, and size, for example.
  13. To pull data from the Tekla Structures model or drawing, you need to add the necessary value fields.
    1. Select Insert > Value Field and click inside a row to place the value field in the template.
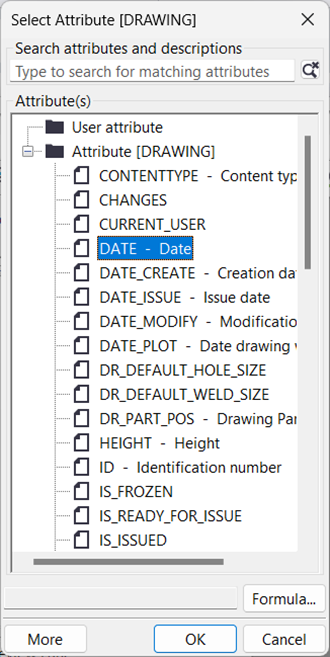
    2. Select the desired attribute.

      Select what data is to be linked. Such data corresponds to the properties in the model or drawing. You can modify the properties for value fields by double-clicking an item.

    3. Click OK.
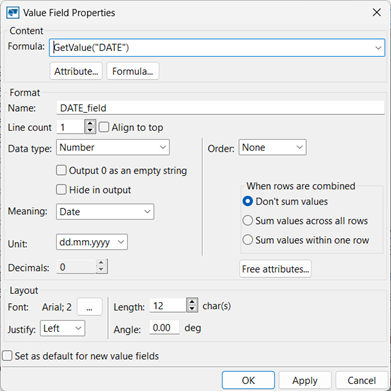
    4. To modify the value field properties, double-click the field.

    5. Add additional fields as desired.
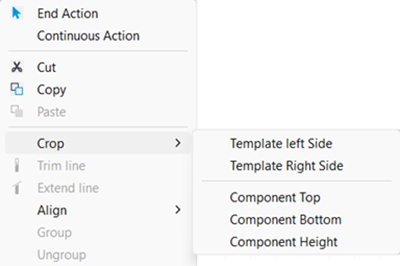
  14. To adjust the template size, select the row, right-click and use the necessary Crop options to remove excess space.
  15. Save your title block template in the current model folder, project or firm folder, or in the system folder.
Now you can add the new title block template in the desired drawing layouts.
Was this helpful?
Previous
Next