
Move objects in models or in drawings
You can move objects in Tekla Structures in a number of different ways, especially in models. When you move an object, Tekla Structures also copies all objects connected to it, including the components.
Move objects in a model or in a drawing
The basic way to move objects in a model or drawing is by defining the origin and one or more destination points.

-
Select the
objects you want to move.

-
Pick the origin for moving.

In the model, Tekla Structures displays a rubber band line between the first picked point and the cursor position. This is a preview of the position where the objects will be moved. Move the cursor to see how the preview changes.
Note that Tekla Structures always displays the preview in the position where the objects will be moved, not in the position where the cursor is when you pick the destination point.
If you want to limit the number of objects shown in the preview, use the advanced option
XS_PREVIEW_LIMIT. The default value is 1000. When the value is 0, the preview is off. -
Pick the destination point.

The objects are moved immediately. The Move command does not remain active.

Move objects by specifying a distance from origin in a model or in a drawing
You can move objects to a new position in the model or drawing by specifying a distance from the origin. Use the Enter a Numeric Location dialog to specify the distance.
Move objects using drag-and-drop in a model or in a drawing
You can move objects in a model or in a drawing by dragging them to a new location.
-
Select the objects you want to move.
In drawings, you can drag annotations, sketch objects, and grid labels. To move grid labels, first select the grid label and then either activate the
 Select grid line selection switch or select the grid label handle.
 For more information, see Drag, reshape, and resize drawing objects.

-
Drag the objects to a new location.
In a model, the point you start dragging from (center, corner, or middle point) affects the object's alignment in the new location.

The objects are moved immediately.

-
To move an end point using drag-and-drop:
-
Hold down the left mouse button, and drag the handle to a new location.

The end point is moved accordingly:

Note that for some objects you may need to switch on Smart select to drag from handles without selecting them first. To switch it on, click and select the Smart select checkbox.
-
Hold down the left mouse button, and drag the handle to a new location.
Move objects linearly in a model
In a model, you can move objects linearly to a new position.

- Pick two points in the model, or enter the coordinates in the dX, dY, and dZ boxes.
You can also use a formula to calculate the x, y, and z displacements. For example:

Tip:
If the dialog is open but the command is not active anymore, click the Pick... button to re-activate the command.
Move objects to another plane in a model
In a model, you can move objects from the first plane you specify to the second, third, and so on, plane you specify. The moved objects remain in the same position in the second plane, third, and so on, plane as the original objects in the first plane.
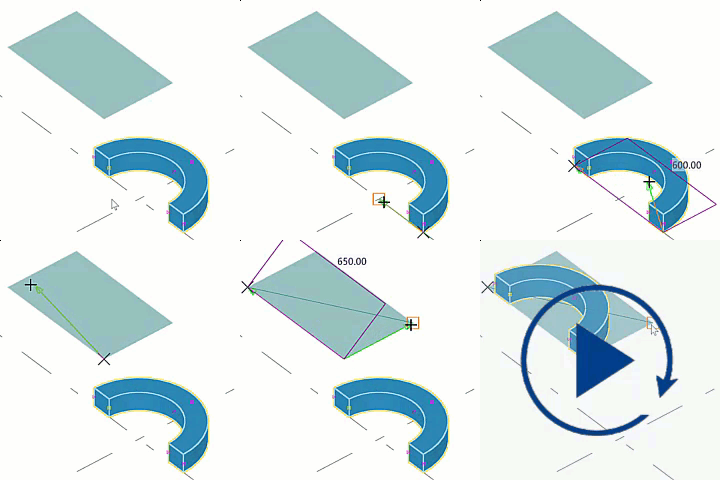
- Select the objects you want to move.
- On the Edit tab, click .
- Pick the point of origin of the first plane.
- Pick a point on the first plane in the positive x direction.
- Pick a point on the first plane in the positive y direction.
- Repeat steps 3–5 for the destination planes.
Move objects to another object in a model
In a model, you can move objects from an object to other, similar objects. This is useful, for example, when you detail previously modeled parts. The objects that you move between can have different dimensions, length, and rotation.
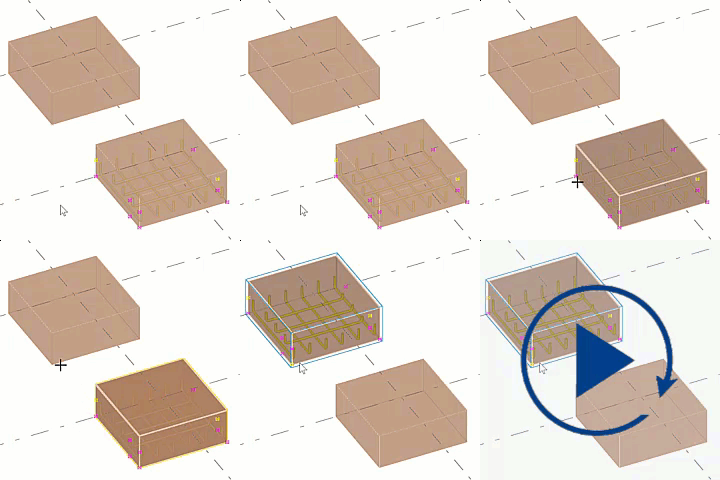
If you move reinforcement or surface treatments and want them to adapt to the part they are moved to, note the limitations:
-
The reinforcement or surface treatment handles must be in part corners.
-
The parts between which you move must have the same number of cross-section corners.
-
Circular parts must have the same cross-section dimensions.
- Select the objects you want to move.
- On the Edit tab, click .
- Select the object to move from (source object).
- Select the objects to move to (target object).