Add and modify section marks in drawings
You can add section marks in an open drawing, and modify the existing section marks.
You can add section marks only, or section marks together with section views. One example of a situation where you might want to add a section mark without a section view is when you have a similar section that already has a section view. For more information about creating section views, see Create drawing views.
Add section marks
-
You can load predefined section
mark properties and search for properties:

-
In the visual mark editor:

- Click the Properties or Values button to show either the property name or the property value in the preview. These buttons are only available when you are modifying a mark, not when you are creating one.
- To indicate which end of the cutting line you want to work with, click Start or End.
- To add more containers in the mark, click the container button
 . You may add up to five
containers.
. You may add up to five
containers. - To add elements in an empty mark container, click the container button
 in the preview and
select the desired element.
in the preview and
select the desired element. - To add more elements in the current container, click the plus button
 to open the element list,
and then select the desired element. You can also search for elements.
to open the element list,
and then select the desired element. You can also search for elements. - You can drag elements inside and between containers. Containers cannot be dragged.
- To delete an element in a container, click the red delete button
 in the upper-right corner
of the element.
in the upper-right corner
of the element. - To delete a container, click the red delete button in the upper-right corner
of the container.
- To add a frame, click a container or an element, click the plus button
and select
Frame from the element list.
-
Modify section mark
properties:
Setting Description Font Font color, Font, Font height Define the mark font color, type, and height.
Before changing the font, select the object that you want to modify:
- To change the font in an element, click the element.
- To change the font in a container, click the container.
- To change the font in all containers, click the background.
Clicking ... gives more font choices.
Frame Frame, Frame color
Add a frame around the selected containers or elements and define the frame type and color.
You can also add a frame from the element list.
Text placement Show on Define if the section marks are shown at both ends of the cutting line or only at one end.
Text position Define the position of the container in relation to the line or in relation to the symbol or symbol center line. Text rotation Define the rotation of the container. X offset for text Set the horizontal offset of the section mark container from the cutting line. Y offset for text Set the vertical offset of the mark container from the cutting line. Cut direction symbol Symbol
Symbol color
Symbol size
X offset for symbol
Y offset for symbol
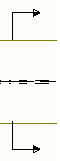
Define the cut direction symbol properties separately for the Start and End symbols. If you want to use Custom symbols, define the advanced options XS_SECTION_SYMBOL_RIGHT_ARROW_SYMBOL and XS_SECTION_SYMBOL_LEFT_ARROW_SYMBOL.
X offset for symbol defines the horizontal offset of the symbol from the cutting line.
Y offset for symbol defines the vertical offset of the symbol from the cutting line.
Line Line color Distances
Define cutting line color and dimensions. 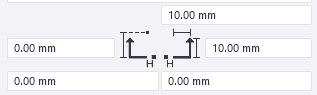
-
Pick the first and the second
point on the cut plane.
Move or copy section marks
- Copy section marks using Ctrl+drag.
- Copy section marks inside a drawing view with the context menu commands and , the ribbon command Copy, or by entering Copy - Linear in Quick Launch. You can also use the keyboard shortcut Ctrl+C.
- Move section marks using Shift+drag.
- Move section marks inside a drawing view with the context menu command , the ribbon command Move, or by entering Move - Linear in Quick Launch. You can also use the keyboard shortcut Ctrl+M.
Section marks can only be copied or moved within a view. When moved beyond the view frame, the view frame will adjust so that the section mark will always be within the frame.
Modify section mark properties
- To modify the section mark properties, click the section mark. If the property pane is not
open, double-click the section mark. If you want to modify several section
marks, hold down Ctrl and click the marks.
Click the Properties or Values button to show either the property name or the property value in the mark editor view. These buttons are only available when you edit an existing mark.
If you have a section view created for the section mark, and you click the section mark in the drawing, the property pane title changes to Section mark with view and you can also modify the section view label properties in the same property pane.
- Modify the properties.
If you have selected several section marks, the properties that have different values have the text Varies. You can select another value from the list.
- Click Modify to apply the changes in all selected section marks.