Import loadcases and combinations from a spreadsheet
Loadcases and combinations defined in an Excel Spreadsheet can be imported via the ‘Import…’ button on the Loading dialog.
The data must be in the form of a matrix of combination factors in which loadcases form the row headers and combinations the column headers or vice-versa. Where a matrix value is blank the associated case is omitted from the combination. The load type can be set by including in the loadcase name “DL” for dead load, “LL” for Imposed and “Wind” for Wind (without quotes).
The selected spreadsheet’s Worksheets are automatically listed and one is selected for import.
Flexible controls allow definition of whether Loadcases are listed in a column and combinations in a row or vice-versa and selection of the case and combination column/row sources. Identified cases and combinations can be reviewed prior to import and the case Type can be edited as necessary.
Note: The following default/ automatically determined loadcases are not supported by this
feature and would need to be manually added to combinations after import; Self weight -
excluding slabs, Slab self weight, Notional Loads (EHF, NHF and NL).
Example
We want to import the following loadcases and combinations:
| Combination Name | Loadcase | Strength Factor |
|---|---|---|
| dead + imposed | DL Dead | 1.35 |
| LL Imposed | 1.5 | |
| Dead+Imp+Wind Accomp | DL Dead | 1.35 |
| LL Imposed | 1.5 | |
| Wind | 0.75 | |
| Dead+Imp Accomp+Wind | DL Dead | 1.35 |
| LL Imposed | 1.05 | |
| Wind | 1.5 | |
| Dead+Wind | DL Dead | 1.35 |
| Wind | 1.5 |
- In an Excel spreadsheet a matrix of loadcases and combinations is set out like this:
 Note: An empty cell is used to indicate a Loadcase is not to be included in particular Combination.
 - Starting from either the Loadcases or Combinations dialog in Tekla Structural Designer, click Import to start the Import loading wizard, the first page of which
is:
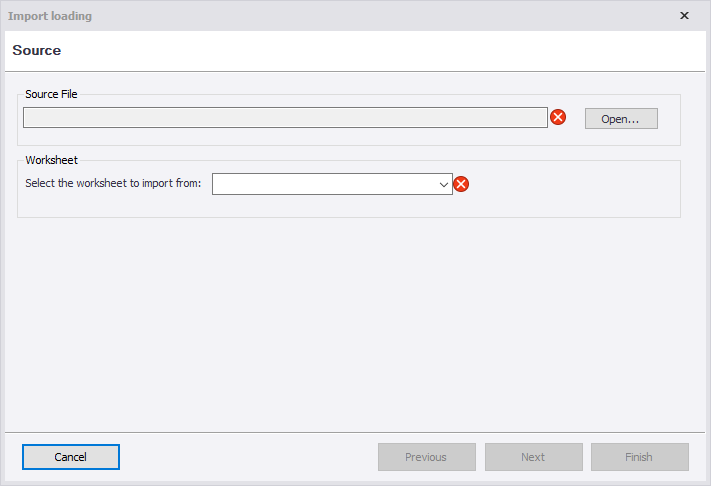
- Click Open ... to navigate to the Excel file and the Sheet within the Excel file which contains the matrix and then click Next.
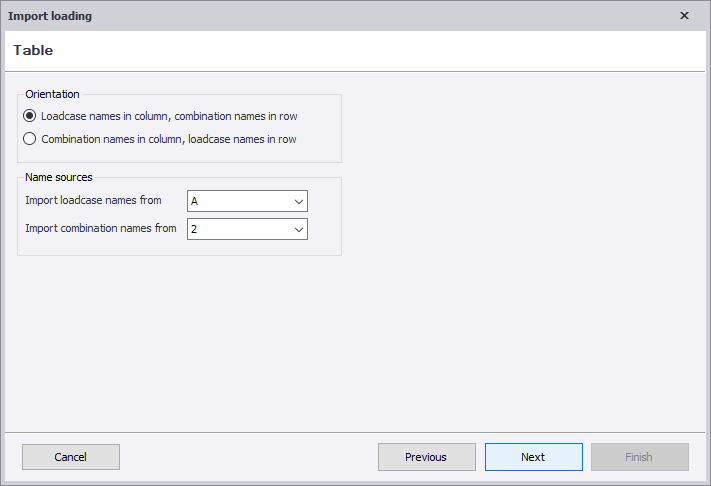
- In the next page of the dialog you then choose the orientation of your matrix and confirm
the Excel column & row which contain the Loadcase and Combination names (i.e.
the matrix column and row headers). For this example the correct orientation and
name sources are:
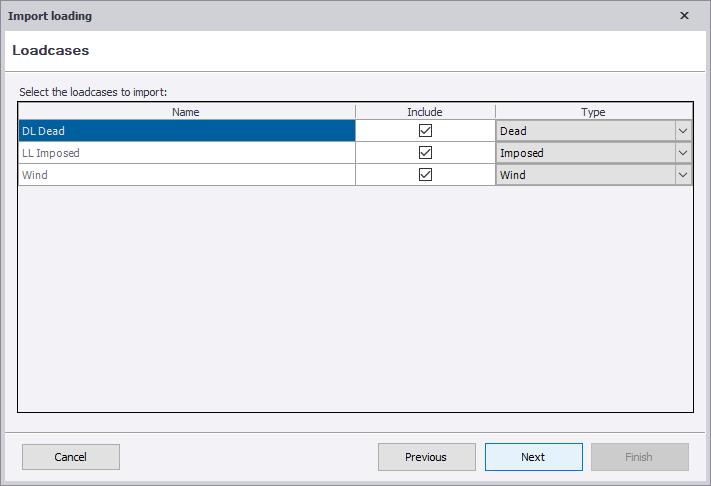
- The next page of the dialog allows you to confirm/amend Loadcase options (a) Include
(in the imported loadcases) - default is Include checked on, and (b) Type
(the Loadcase type from Dead, Slab Dry, Slab Wet, Live, etc) - default is Dead for
those names that can’t be identified automatically:
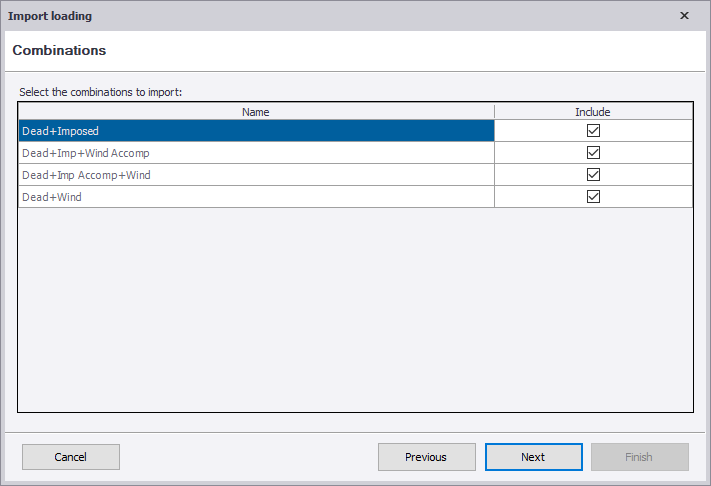
- The next page of the dialog allows you to confirm/amend the Combination option
Include (in the imported combinations) - default is checked on:
- The final page of the dialog summarizes the number of loadcases and combinations that will be imported, after which click Finish to complete the import process.
- In the Loading dialog review the combinations, amend the combination classes where required, and if necessary include additional loadcases (e.g. automatically determined self weight).