Display and change dimension point associativity

Tekla Structures
2023
Tekla Structures

Display and change dimension point associativity

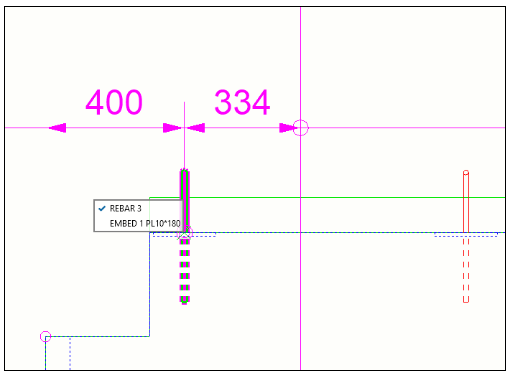
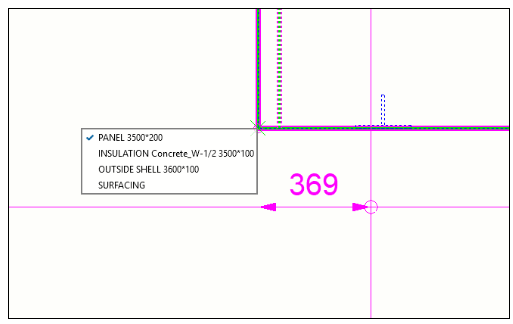
You can change the dimension point associativity to avoid incorrect associativity, or to simply make the associativity selection distinct. Each dimension point associativity anchor shows a list of objects that have locations available for association. You can change the dimension point associativity in straight dimensions only.

Dimensioning points created in Tekla Structures are associated to the objects where the dimension points have been added. This allows the dimensions to update automatically when the objects are changed during modeling.

Sometimes the dimension point locations may be unclear due to orthogonal projection. A dimension point might be not be associated to the desired object because there are various other objects in the same point location. In drawing update or cloning, this may lead to unwanted dimensioning values or associativity.

It is also possible to associate dimensions to object center lines outside the object area.

Display and change dimension point associativity

  1. In an open drawing, select the desired dimension or dimension set.
  2. Click a dimension point associativity anchor.

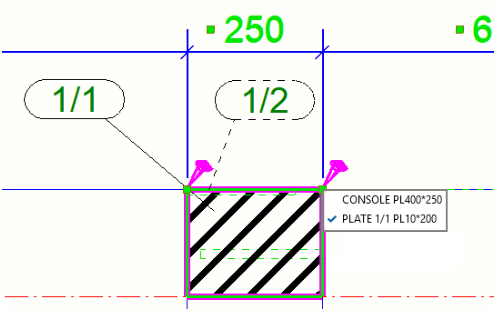
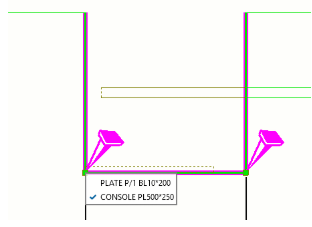
    This displays the dimension associativity rule list, which shows the objects where the dimension point can be associated.

    Note that the feature intelligently selects the rules based on the data collected on previously selected rules in the range of the dimension that is being created. When you continue picking dimension points you may notice that the associativity rules similar to the rules picked earlier are selected automatically.

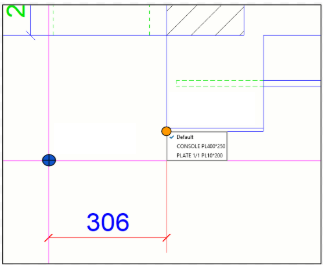
    The associativity rule list is located so that it avoids overlapping with the building objects and mouse pointer. The feature detects the current position of the mouse pointer and keeps the associativity rule list on the opposite side relative to the picked dimension point.

    In the following image, the mouse pointer position is indicated with a blue circle and the picked dimension point with an orange circle:

  3. Click a rule in the list to select it and associate the dimension point to a new object.

    When you click the rule, the corresponding object is highlighted in the drawing. This makes it easy for you to to check if the selected rule refers to the object you want.

  4. You can also do the following:
    • Open a several dimension associativity rule lists at a time by holding down Ctrl or Shift and clicking dimension point associativity anchors, or holding down Alt and using area selection.

    • Open all associativity rules related to the selected dimension, click a dimension and select Show dimension associativity rules from the context menu.

    • You can alter associativity rules by scrolling the mouse wheel while mouse cursor hovers over a rule list.

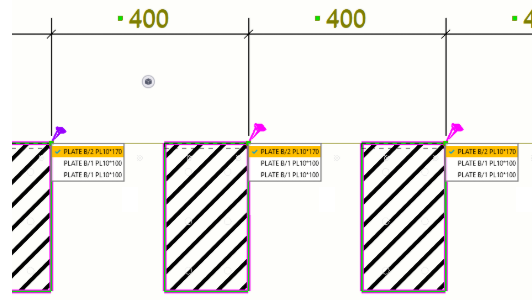
    • To select associativity rules related to same object types in all opened rule lists, double-click the desired rule. Selected rules will be highlighted with yellow color in all opened rule lists.

    • You can control the maximum number of shown rules in the associativity rule list with the following advanced options:

      XS_INTELLIGENCE_MAX_RULE_COUNT

      XS_INTELLIGENCE_MAX_PART_COUNT

      XS_INTELLIGENCE_MAX_PLANE_COUNT

      If the needed associativity option is missing from the rule list, increase the number of the shown rules by changing the advanced option values.

  5. Click the drawing background to close the rule list.

Select dimension point associativity in manual dimensioning

You can select the associativity rules for each dimension point during manual dimensioning of the drawing objects. This way you can properly associate a dimension during its creation, and the dimension locations are preserved better during updates and cloning.
  1. In an open drawing, activate the dimension creation associativity functionality: Go to File > Settings, and select the Dimension creation associativity check box.
  2. Start creating a dimension with any of the following dimensioning commands: Horizontal, Vertical, Orthogonal, Perpendicular, Parallel or Free.
  3. To display the associativity rule list, pick a dimension point position.

  4. Select the desired associativity rule in one of the following ways:
    • By scrolling the mouse wheel when the mouse pointer is on the associativity rule list.

    • By directly selecting the desired associativity rule from the list by clicking the rule with the left mouse button.
    • By entering the Select next associativity option command in Quick Launch.
    • By using a keyboard shortcut that you have defined for Select next associativity option.

    When you select a rule, the related object is highlighted in the drawing, which allows you to check if the selected rule refers to an appropriate object.

    When you have selected the associativity rule, you can continue creating the dimension by picking the following dimension points. The associativity rule list is displayed each time when a point with available associativity rules is detected.

Limitations

  • Selecting dimension associativity rule during manual dimension creation works only with straight type of dimensions, only with the following commands: Horizontal, Vertical, Orthogonal, Perpendicular, Parallel and Free.

  • Some rules can be missing in the associativity rule list. To increase the number of rules listed in associativity rule list, increase the value of the following advanced options:

    XS_INTELLIGENCE_MAX_RULE_COUNT

    XS_INTELLIGENCE_MAX_PART_COUNT

    XS_INTELLIGENCE_MAX_PLANE_COUNT

Associativity rule list content

  • The following attributes are shown in the rule list for the following building objects:

    • Steel parts: "NAME", "PART_POS", "PROFILE"

    • Concrete objects: "NAME", "PROFILE"

    • Polygon cuts: "NAME", "PROFILE"

    • Reinforcement: "NAME", "REBAR_POS"

    • Bolts: "NAME", “DIAMETER”, “LENGTH”

    • Grid: Grid "NAME"

    • Intersection of grid line and building object side: Grid “NAME” or the label of the building object:

    • Intersection of grid lines: Grid “NAME”/”NAME”:

    • Building object reference line or centerline: “Reference point” or “Center” accordingly

    • Pour units: Pour object "POUR_TYPE", # "POUR_NUMBER"

    • The Default associativity rule is not always shown in the associativity rule list, unless it is the only rule available, or if it has been previously selected as the active rule for the chosen dimension point. If Default is selected, the dimension point will automatically select which object to follow during the dimension update based on the new position of the objects. Note that there might not be any rule in the associativity rule list that would correspond the behavior of the Default option. Selecting another option than the Default option makes it possible to guarantee which object will be followed during the dimension update.

    • Display dimension associativity with the Clone and Clone selected commands:

      • Changing associativity rules in selected dimension points allows you to achieve more accurate results in cloning dimensions in drawings. An associativity option selected in a rule list will be preserved in the cloned dimension if the selected rule corresponds to a similar object in a cloned drawing or in a target selection in a GA drawing. Objects are not considered to be similar if they have been modeled by using different commands, such as steel beam, steel plate, reinforcement, or bolt.

      • Note that when the drawing is cloned automatically due to renumbering, the associativity rules are recomputed from scratch and any preferred rules set by the user are lost.

Was this helpful?
Previous
Next