Snap to a point or line
2018
Tekla Structures
Snap to a point or line
Most commands ask you to pick points to place objects in the model or drawing. This is called snapping. When you are creating a new object, Tekla Structures displays snap symbols for the available snap points and displays a green line between the snap point and the last point picked. Use the snap switches to control which positions you can snap to.

Tekla Structures displays snap dimensions to help you create objects of a desired length. Use the advanced option XS_DISPLAY_DIMENSIONS_WHEN_CREATING_OBJECTS to switch the snap dimensions on or off.
Snap to a line
Use the Snap to line snap switch when modeling objects that should be lined up with an existing object or a grid line.
- Ensure that the
 Snap to line snap switch is active.
 - Run a command that requires you to pick two or more points.
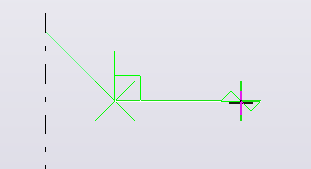
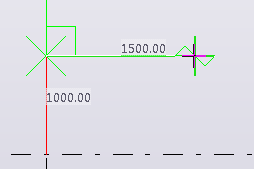
For example, start creating a beam. When you move the mouse pointer over a nearby object, Tekla Structures automatically picks both ends of the line. The yellow arrow symbol indicates the direction of the points.
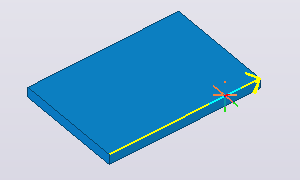
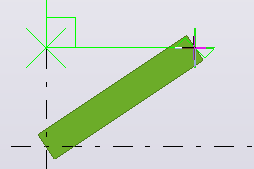
- Click the left mouse button to confirm the snap position.
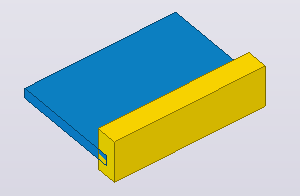
Tekla Structures creates the object. For example:
Snap to extension lines
You can snap to the extension lines of nearby objects. This can be useful, for example, when you want to align objects with one another.
- Ensure that the correct snap switches are active:
Switch on
 Snap to extension lines
 Switch on either
 Snap to intersection points or
 Snap to nearest points (points on line) if you are snapping to the intersection of an extension line and a grid line
Switch off
 Snap to end points if you are working in 3D
- Move the mouse pointer close to nearby objects to see the extension lines.
When a line is found, you can move the pointer further away while keeping the snap.
- Pick the rest of the points.
Tekla Structures creates the object:

Snap to orthogonal points
Use the Ortho tool to snap to the closest orthogonal point on the plane (0, 45, 90, 135, 180 degrees, and so on). The mouse pointer automatically snaps to positions at even distances in the given direction. This can be useful, for example, if you need to place marks in a consistent manner in exact locations in a drawing.
- Run a command that requires you to pick points.
For example, start creating a beam. Tekla Structures displays an angle symbol to indicate the direction of snapping. The snapping precision depends on the current zoom level.
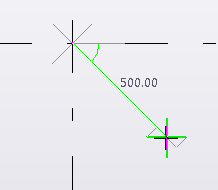
- Click the left mouse button to confirm the snap position.
Tekla Structures creates the object. For example:

Snap relative to previously picked points
When you create objects that require you to pick more than two points, you can snap in orthogonal directions relative to the two previously picked points. This can be useful, for example, if you need to create a rectangular slab that is on the view plane but not along the x and y axes.
- Move the mouse pointer in the model to see the angle symbol.
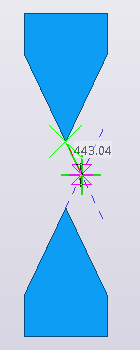
When the snap is orthogonal to the work plane, the color of the angle symbol is green:
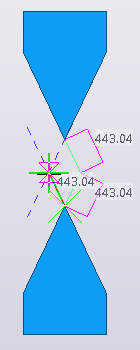
When the snap is orthogonal to the previous points, the color of the angle symbol changes to yellow:
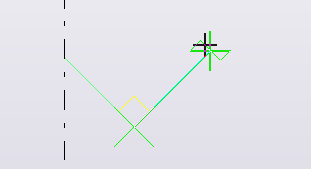
- Pick the rest of the points.
Tekla Structures creates the object. For example:

Create a temporary reference point
You can create a temporary reference point to use as a local origin when snapping in models and drawings.
- Pick the start point.
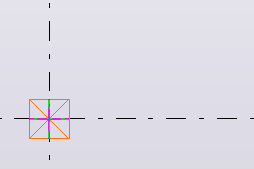
- Hold down the Ctrl key and pick a position.
A green cross indicates that this position is now a temporary reference point.
- Release the Ctrl key and pick the end point.
Tekla Structures creates the object between the start point and the end point. For example:
Lock X, Y, or Z coordinate
You can lock the x, y, and z coordinates on a line. This is useful when you need to determine a point to pick and the needed point does not exist on the line. When a coordinate is locked, you can only snap to points in that direction.